Intellij에서 Spring MVC를 이용하여 Hello World를 띄우기 까지 매우 많은 삽질을 통해 해결했다. 많은 이들이 포스팅을 통해서 삽질을 그나마 줄일 수 있다면 좋겠다.
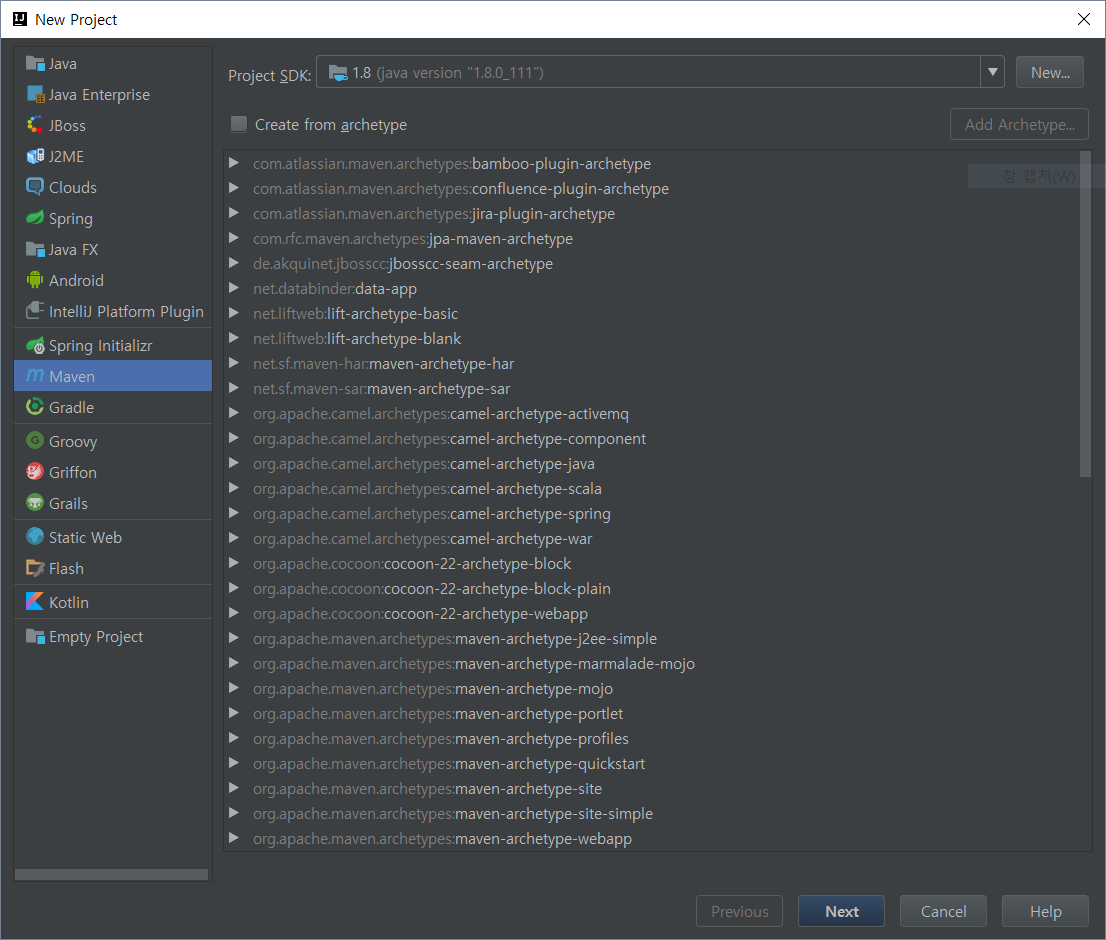
1. Intellij Maven Project 만들기
- New Project - Maven - Create from archetype(해제하기)
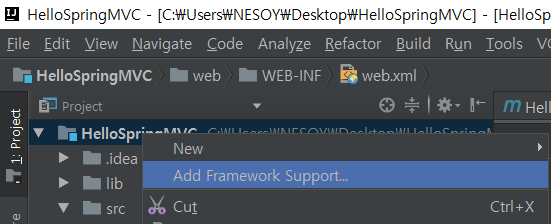
2. Project SpringMVC Framework 추가하기
- Add Framework Support
- Spring - Spring MVC 체크하기
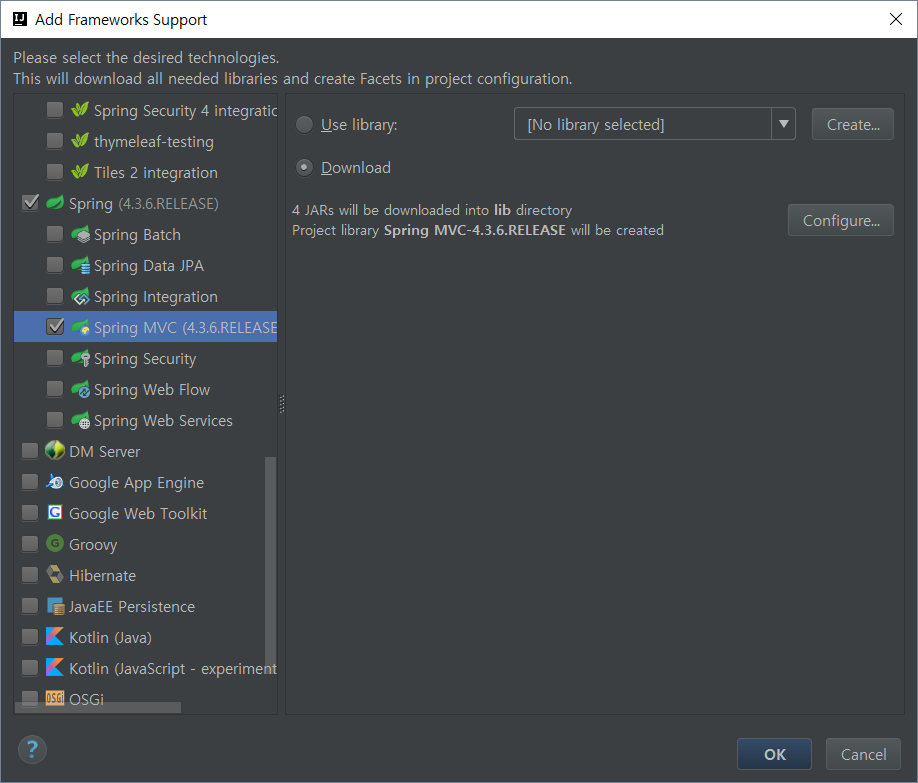
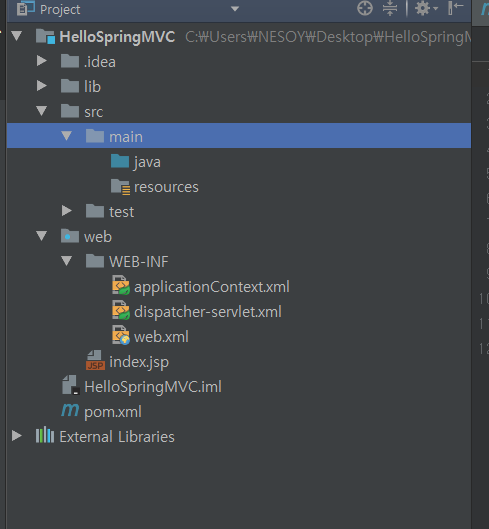
3. Spring MVC Library 다운로드 완료 후 Project 모습
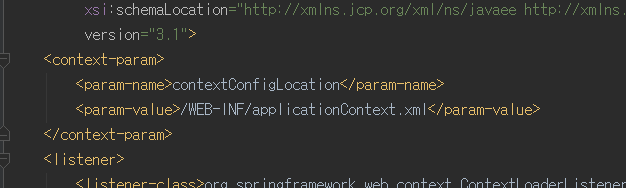
4. web.xml 변경하기
- servlet-mapping의 url-pattern변경하기 :
*.form -> / - 변경 전 web.xml
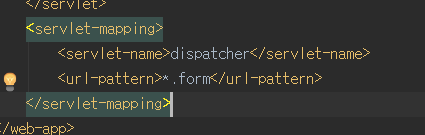
- 변경 후 web.xml
<?xml version="1.0" encoding="UTF-8"?>
<web-app xmlns="http://xmlns.jcp.org/xml/ns/javaee"
         xmlns:xsi="http://www.w3.org/2001/XMLSchema-instance"
         xsi:schemaLocation="http://xmlns.jcp.org/xml/ns/javaee http://xmlns.jcp.org/xml/ns/javaee/web-app_3_1.xsd"
         version="3.1">
    <context-param>
        <param-name>contextConfigLocation</param-name>
        <param-value>/WEB-INF/applicationContext.xml</param-value>
    </context-param>
    <listener>
        <listener-class>org.springframework.web.context.ContextLoaderListener</listener-class>
    </listener>
    <servlet>
        <servlet-name>dispatcher</servlet-name>
        <servlet-class>org.springframework.web.servlet.DispatcherServlet</servlet-class>
        <load-on-startup>1</load-on-startup>
    </servlet>
    <servlet-mapping>
        <servlet-name>dispatcher</servlet-name>
        <url-pattern>/</url-pattern> <!-- *.form -> / 바꾸기-->
    </servlet-mapping>
</web-app>
5. views 디렉토리 파일 만들기 & index.jsp 이동시키기
- New - Directory
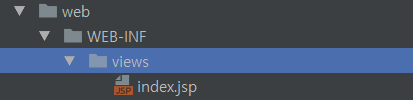
- index.jsp
<%--
  Created by IntelliJ IDEA.
  User: NESOY
  Date: 2017-02-04
  Time: 오후 11:41
  To change this template use File | Settings | File Templates.
--%>
<%@ page contentType="text/html;charset=UTF-8" language="java" %>
<html>
  <head>
    <title>$Title$</title>
  </head>
  <body>
  Hello Spring World
  </body>
</html>
6. dispatcher-servlet.xml에 추가하기
- Annotation활성화 & Scan 파일 지정하기
<?xml version="1.0" encoding="UTF-8"?>
<beans xmlns="http://www.springframework.org/schema/beans"
       xmlns:xsi="http://www.w3.org/2001/XMLSchema-instance"
       xmlns:context="http://www.springframework.org/schema/context"
       xmlns:mvc="http://www.springframework.org/schema/mvc"
       xsi:schemaLocation="http://www.springframework.org/schema/beans http://www.springframework.org/schema/beans/spring-beans.xsd
        http://www.springframework.org/schema/context http://www.springframework.org/schema/context/spring-context-4.0.xsd
        http://www.springframework.org/schema/mvc http://www.springframework.org/schema/mvc/spring-mvc-4.0.xsd">

    <mvc:annotation-driven></mvc:annotation-driven>
    <context:component-scan base-package="Controller"></context:component-scan>

    <bean class="org.springframework.web.servlet.view.InternalResourceViewResolver">
        <property name="prefix" value="/WEB-INF/views/"></property>
        <property name="suffix" value=".jsp"></property>
    </bean>

</beans>
7. Controller 디렉토리 만들기 & 간단한 Controller code
- New - Directory
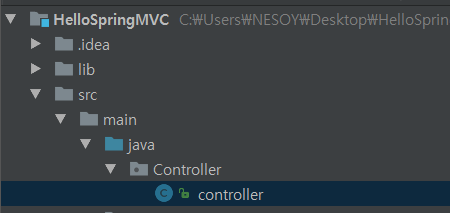
package Controller;

import org.springframework.stereotype.Controller;
import org.springframework.web.bind.annotation.RequestMapping;

/**
 * Created by NESOY on 2017-02-04.
 */
@Controller
public class controller {

    @RequestMapping(value = "/")
    public String test(){
        return "index";
    }
}
8. Run Edit Configuration으로 Tomcat Server 추가하기
- Run - Edit Configuration
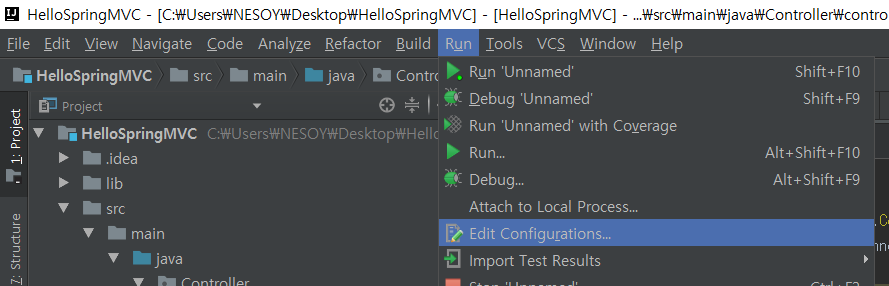
- Tomcat Server 추가하기
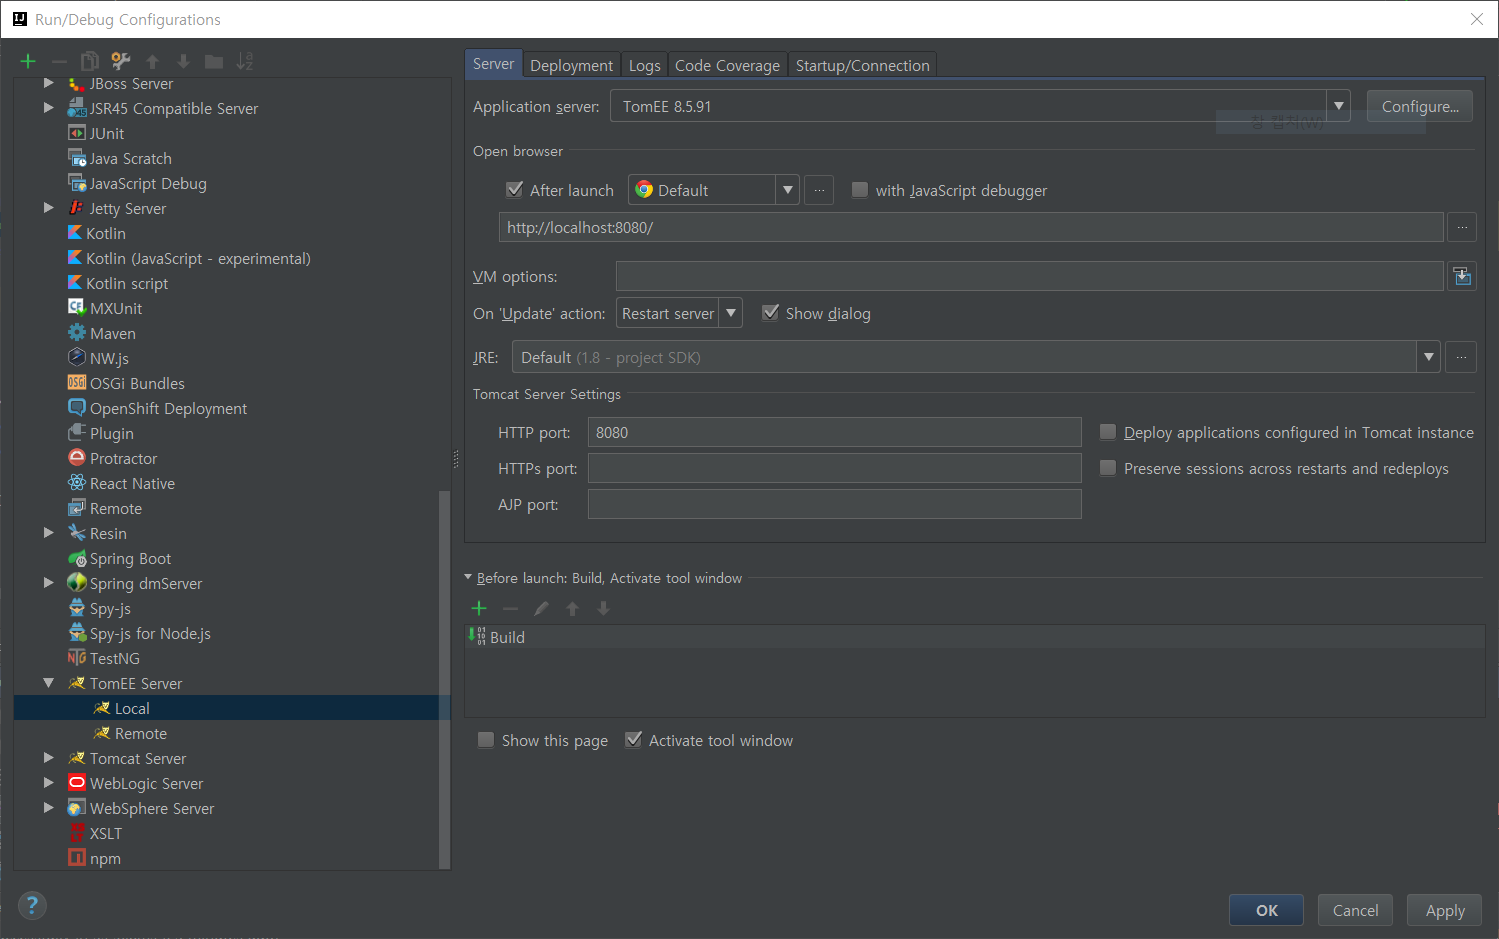
- Warning 나오면 Fix 버튼누르기

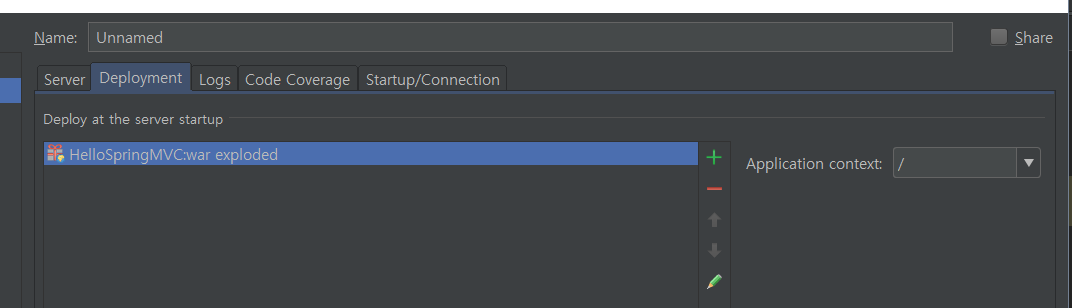
- war exploded로 추가하여 설정한 모습
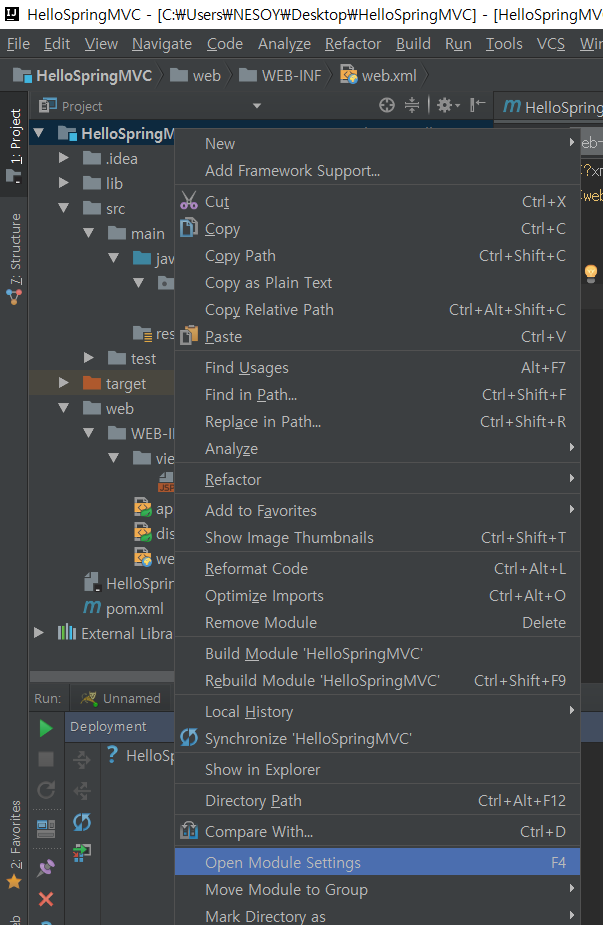
9. Error 1 : web.xml의 ApplicationContext.xml 빨간 글씨가 발생하여 tomcat 실행 X
- 만약 이 에러가 보인다면 아래와 같이 따라하자.

해결 방법 : WEB-INF 경로 잡아주기
- Open Module Settings에 들어간다.
- Modules - web - Web Resource Directory가 빨간 글씨가 된 걸 확인할 수 있다.
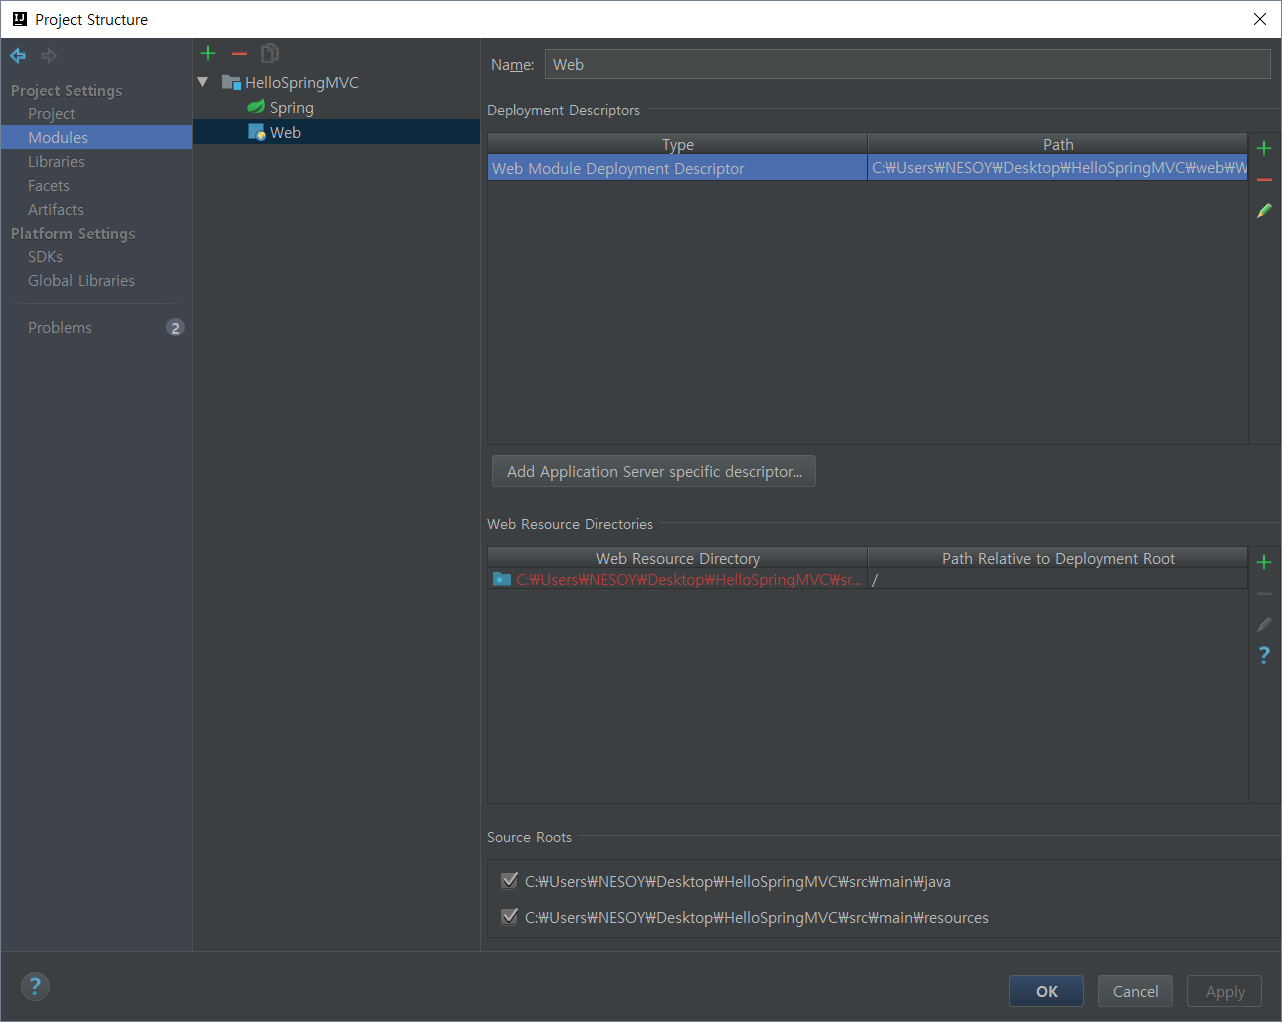
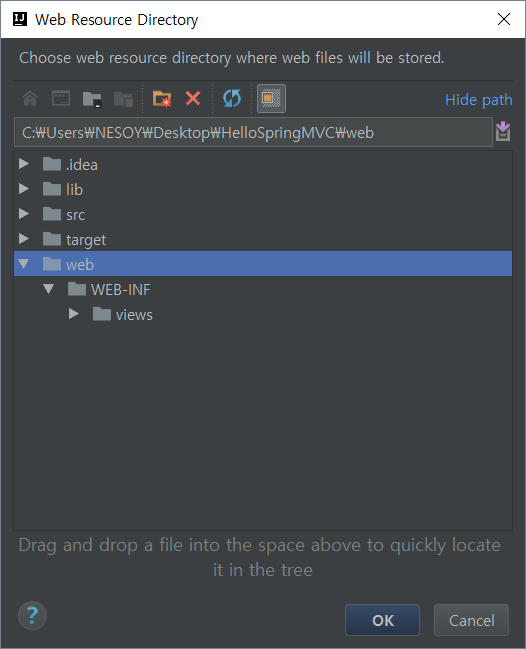
- 경로 다시 잡아 주기
- 해결 된 모습
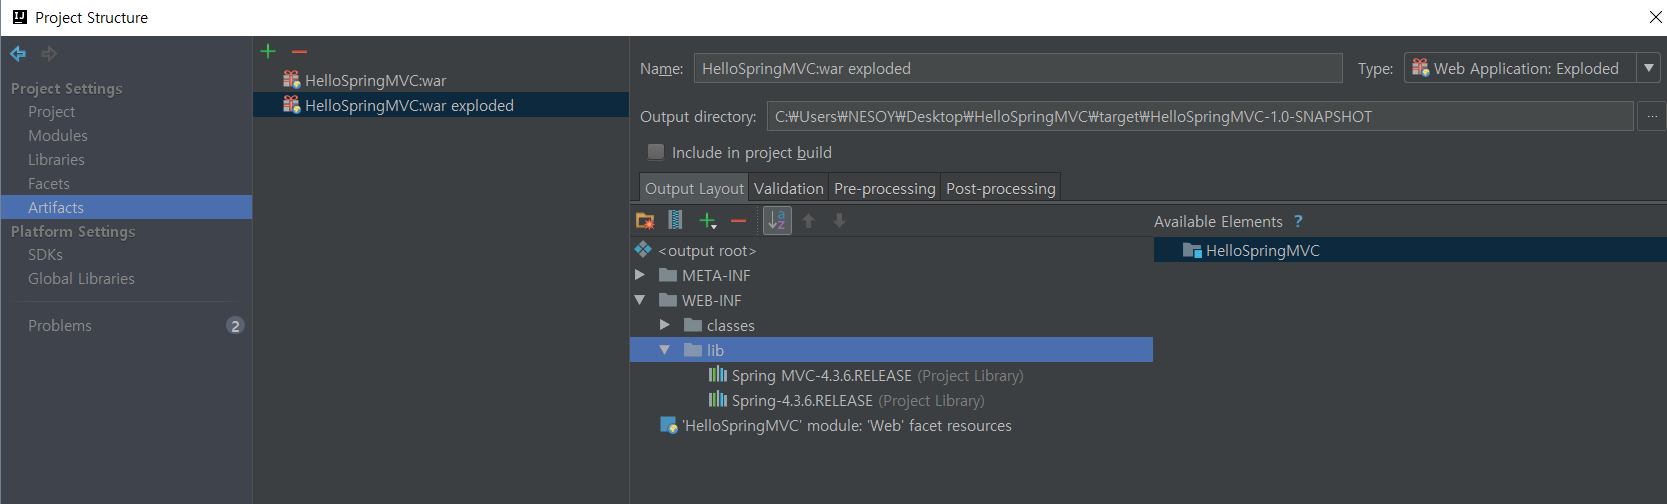
10. Error 2 : Tomcat 오류 - RMI TCP Connection
- 만약 이 에러가 보인다면 아래와 같이 따라하자.

해결 방법 : Library 집어넣기.
- Project Structure - Artifacts에 들어간다.
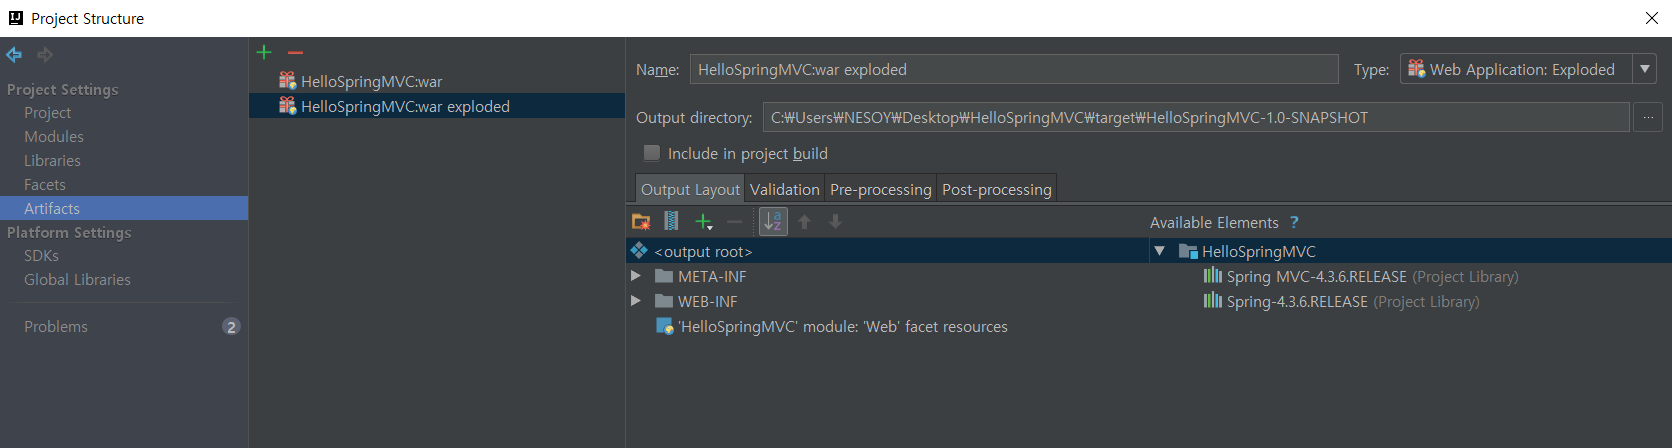
-
Available Elements 아래에 있는 Library를 더블 클릭한다.
-
옮겨진 모습
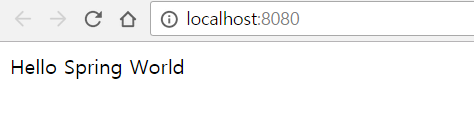
11. 모든 에러를 통과한 후 실행하기
깔끔하게 성공된 모습을 볼 수 있다.